

The WordPress block editor is the default editor in WordPress. It’s the interface you interact with whenever you want to add content to your site, including text and images.
Although the block editor has been part of WordPress core for years now, it wasn’t always the default editor in WordPress.
That would be TinyMCE, a what-you-see-is-what-you-get (WYSIWYG) editor with an interface similar to Microsoft Word.
When the block editor was first introduced to the WordPress community, it was given the codename “Gutenberg,” which is why you’ll often see the editor referred to as “Gutenberg” and why you can still install the Gutenberg plugin from WordPress.org.
Whether you want to call it “the block editor” or “Gutenberg,” in this post, I share a simple guide on how to use the block editor in WordPress.
How to Use the WordPress Block Editor: A Beginner’s Guide
Note: I’m using the Twenty Twenty Five theme for this tutorial. This is the default theme in WordPress. Many WordPress themes have their own blocks and settings for the block editor. This means your interface might look different from the screenshots I share below, but you should be able to follow along just fine.
Let’s start by examining the various locations you’ll see the block editor as you edit your site in WordPress:
- New post editor
- New page editor
- Template editor
Most other interfaces in WordPress use a standard text field or the classic TinyMCE editor.
I’m going to use the new page editor for this tutorial. From the WordPress menu, go to Pages → Add Page.
You’ll be greeted with a “welcome to the editor” message. Read through this, if you wish. If not, you’re safe to close it.
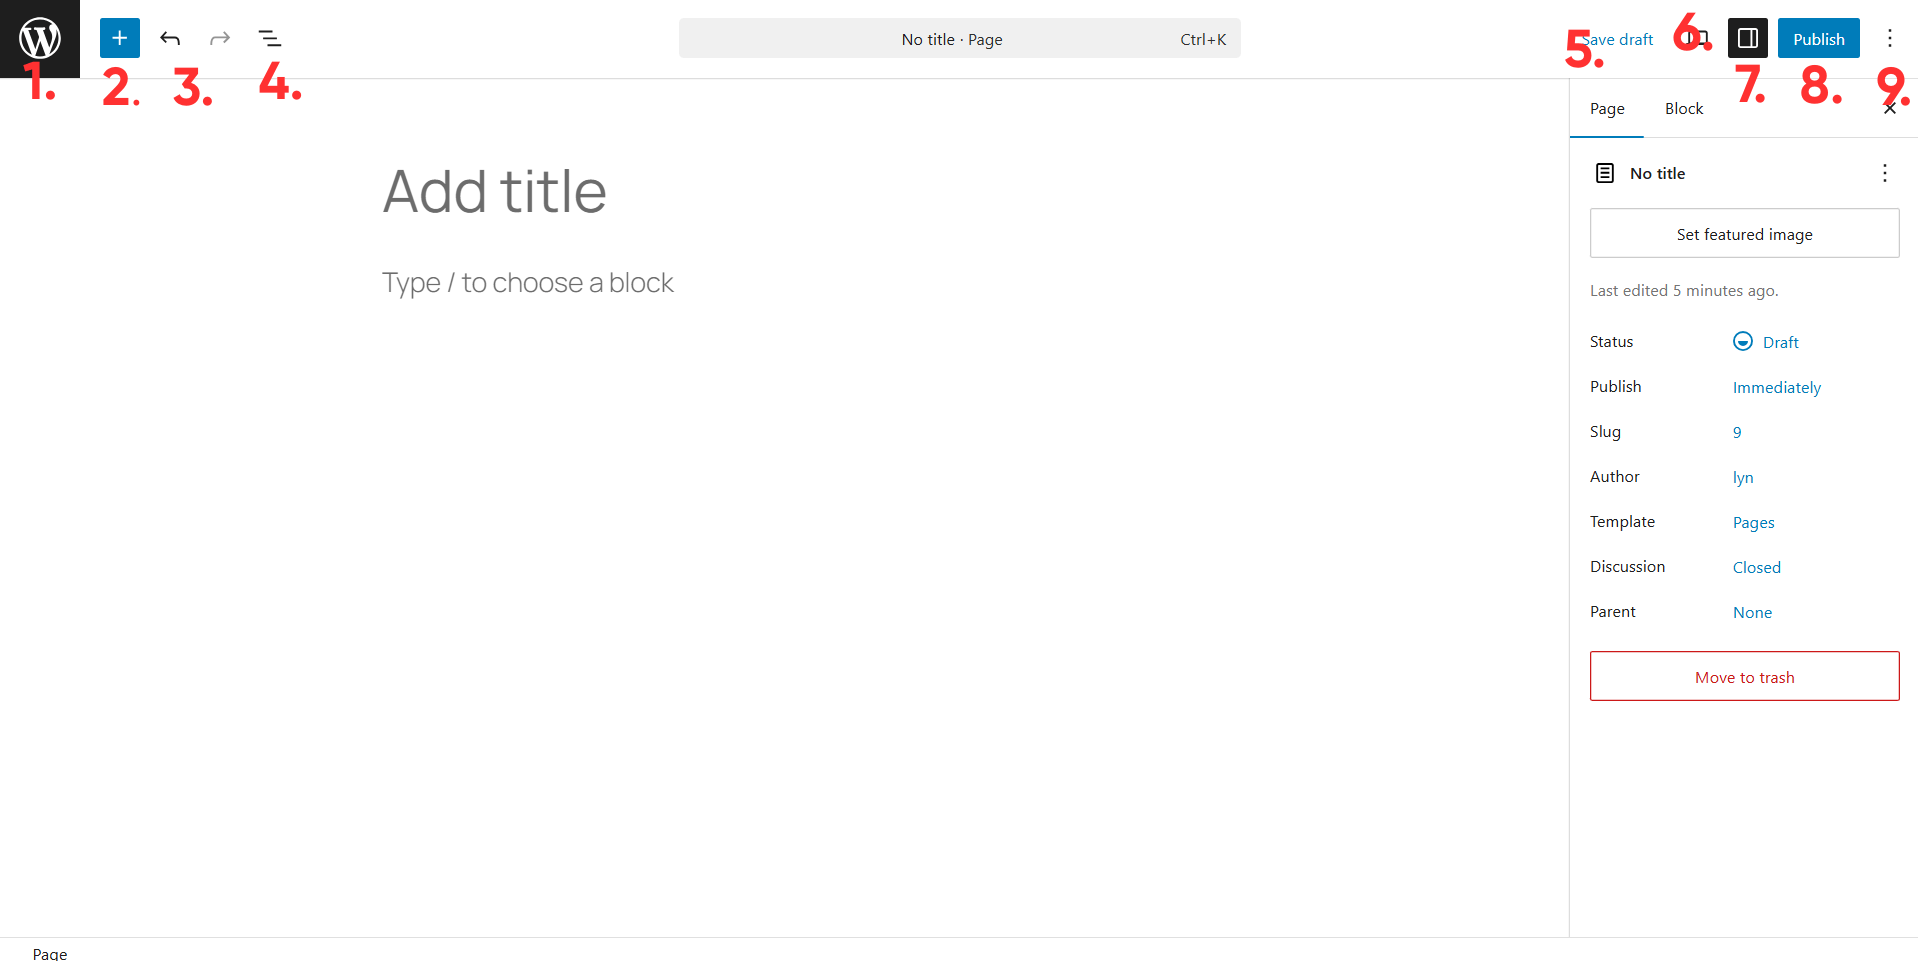
These are the different sections of the WordPress block editor:
- View Pages – Takes you back to the Pages screen.
- Block Inserter – Contains every block you can add to your page. Also has patterns.
- Undo/Redo – Undos or redos the last action you made.
- Document Overview – Contains a list view of each block you’ve added to your page as well as an outline for your page’s content.
- Save Draft – Saves the current state of your page as a draft, meaning it won’t get published to the live version of your site.
- View – Allows you to switch views between desktop, tablet and mobile so you can see how your page looks on different devices. You can also click “Preview in a new tab” to see a preview of how your page looks on the frontend of your site.
- Settings – An interface for your page’s settings. It’s divided into two sections: “Page” for settings that affect your entire page and “Block” for settings that only affect an individual block.
- Publish – Publication settings for your page.
- Options – Minor settings that impact how you use the editor, such as “Distraction Free” to remove the editor’s interface.
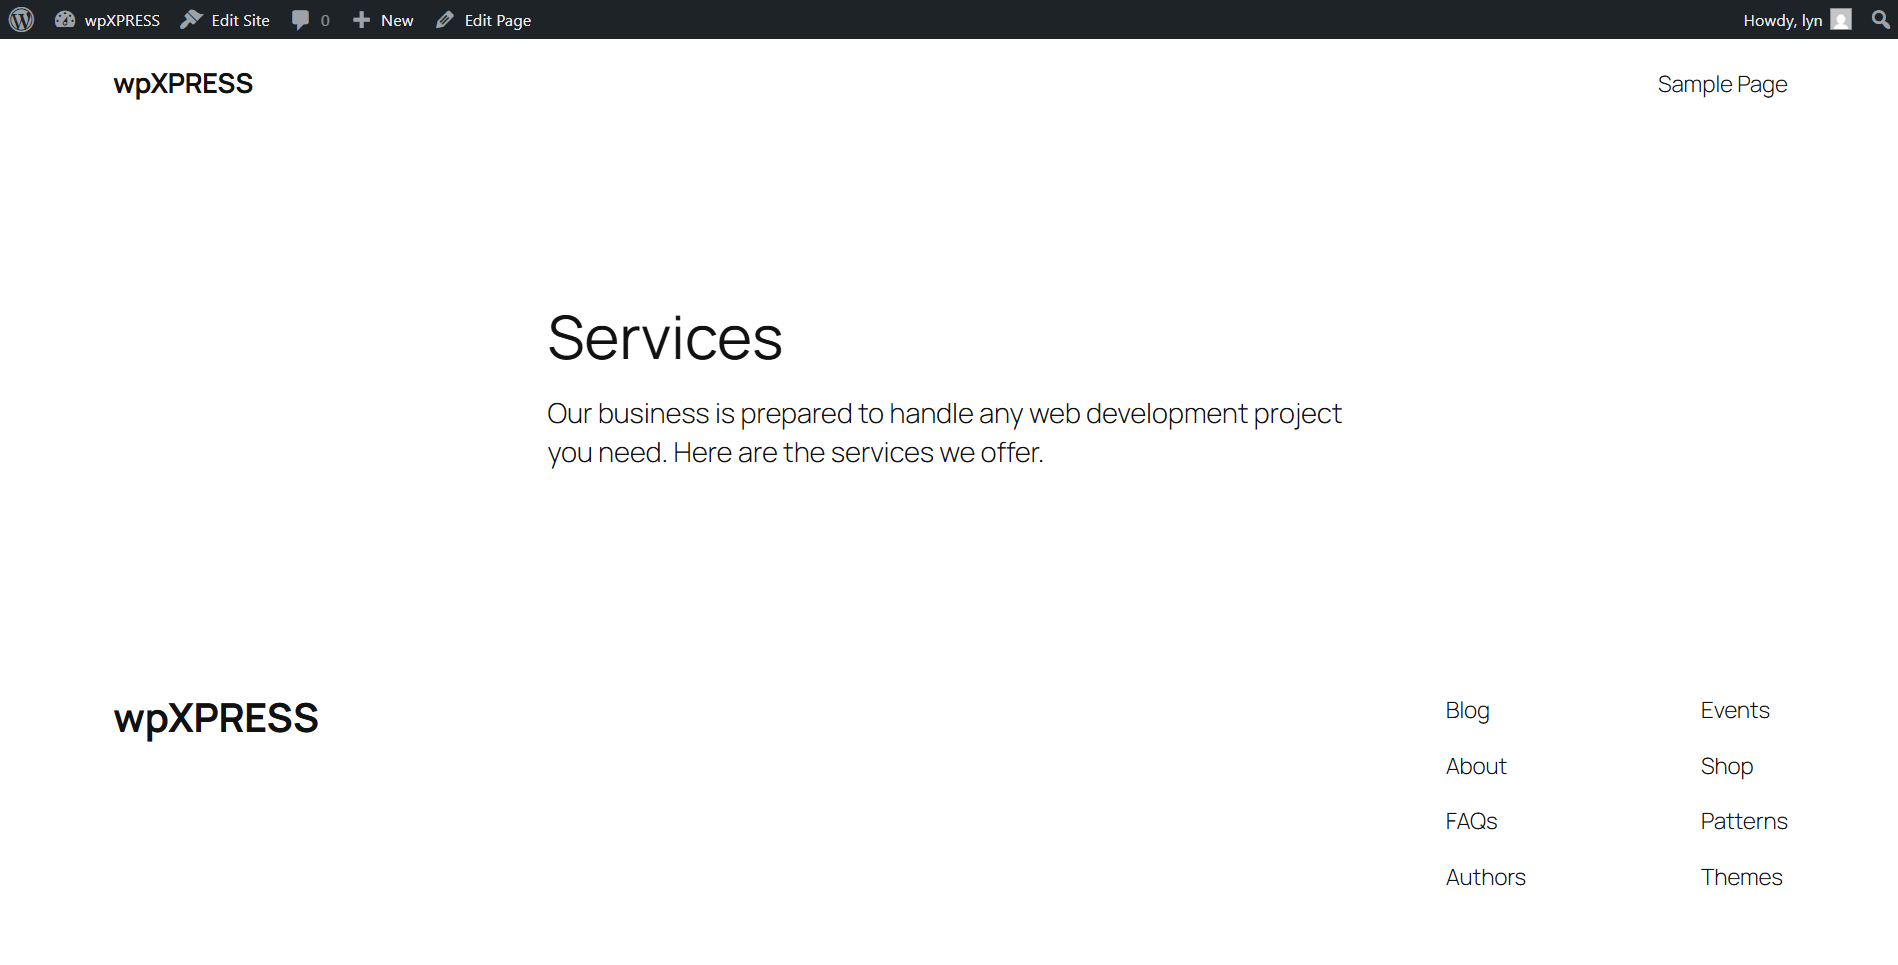
As for how to use the editor, start by adding a title for your page where it says “Add title.”
Your title should be as short and descriptive as possible, such as naming a page “Services” if its intended purpose is to explain the services your business offers.
Here are common pages your site might need:
- Home
- About
- Contact
- Shop
- Blog
The “Type / to choose a block” section is where you add your content.
A Paragraph block is there by default. This means anything you type here will display as text on the frontend of your site.
WORDPRESS BLOCK EDITOR
FRONTEND
How to Add a New Block
There are several ways to add a new block in the WordPress block editor.
First, the “Type / to choose a block” text is actually a direction. Typing a forward slash, or “/”, brings up a popup menu filled with common block types, including Image and Heading.
Typing brings up different block types.
Click on the block you want to add to your page. You can also type in the entire name of the block (“/image”), then click enter.

Second, placing your cursor in the default Paragraph blocks brings up a black plus “+” button.
Clicking this button brings up common block types. Click on one to add it to your page, or click “Browse all” to open the Block Inserter menu.

Speaking of the Block Inserter, you can click the Block Inserter button in the upper, left-hand corner to view all of the blocks you can add to your page.
Click on one to add it to your page.

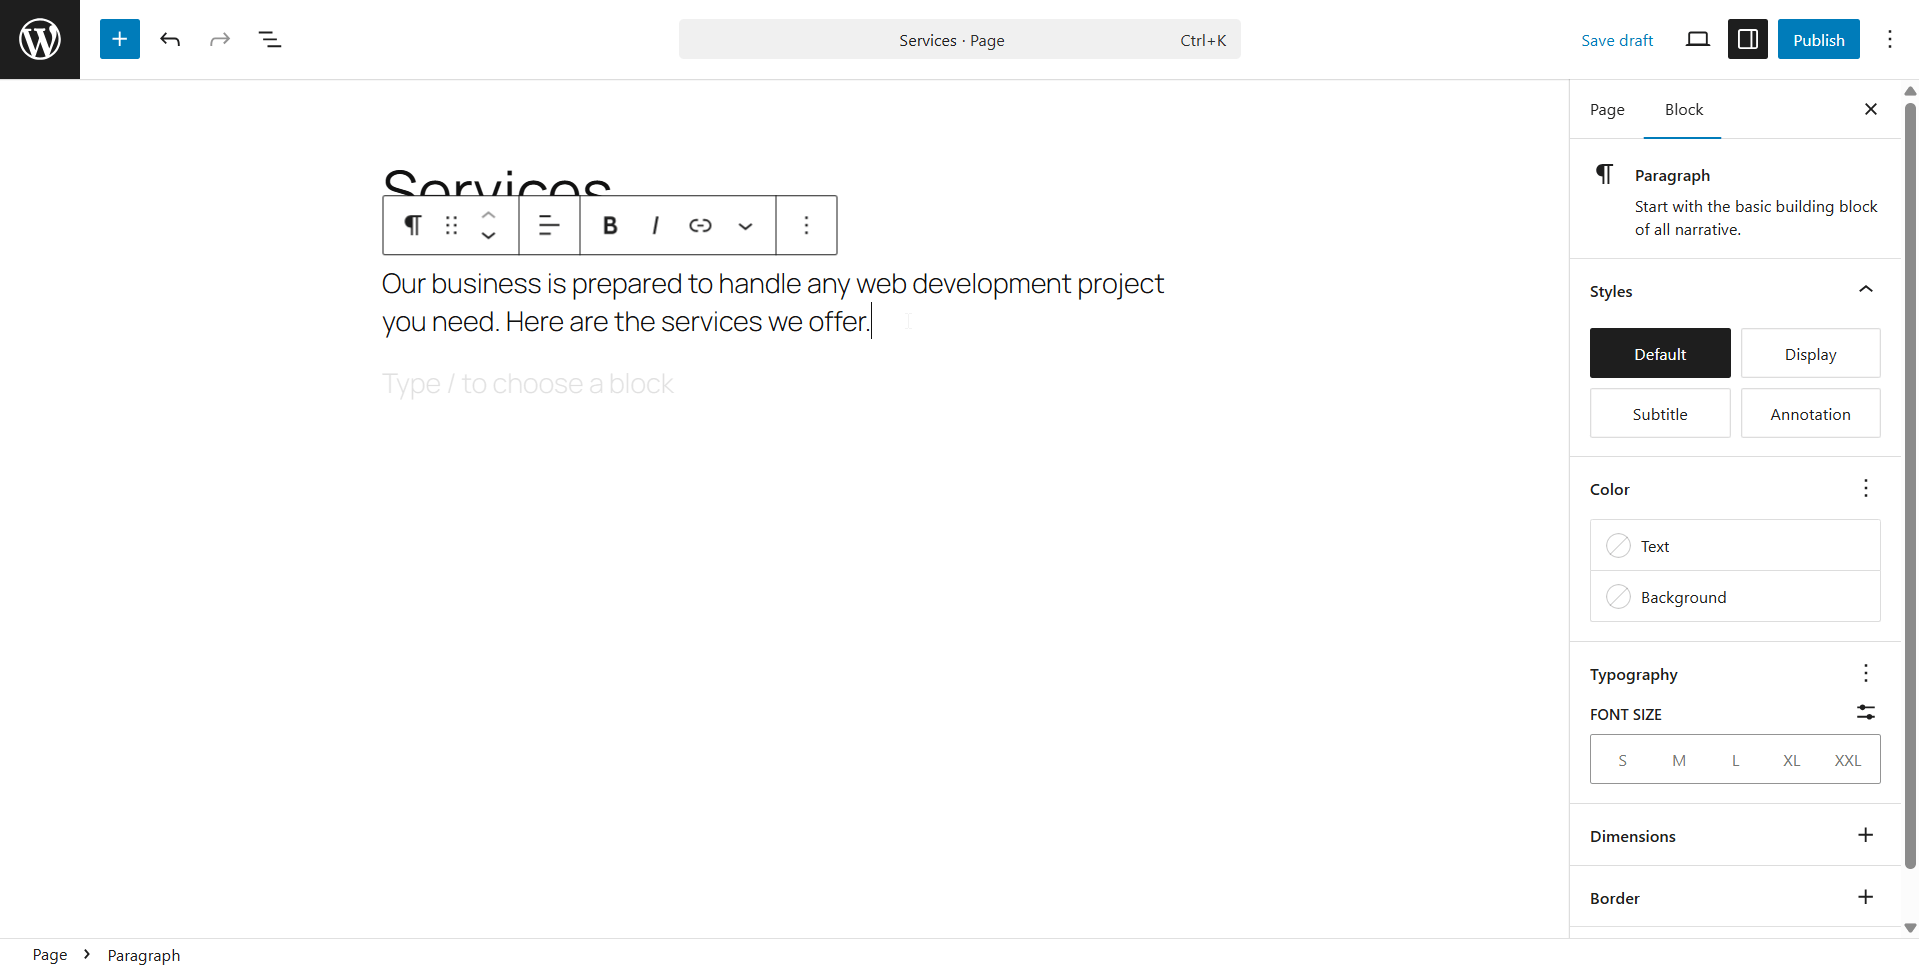
How to Edit a Block
Clicking on any block in the editor opens its settings, which you can use to edit a block using the settings tab (located in the Block tab) on the right side of the user interface (UI).

Some blocks have one tab for settings. Others have more, typically one for settings and one for styles.

Settings for each block are different, but every block has an Advanced section in the Settings tab. You can use this section to create HTML anchors for a block. Developers can add CSS classes.
In addition to the Block tab, you can edit a block using the small popup toolbar that appears when you click on a block.

How to Rearrange Blocks
Now that you know how to add and edit blocks, you’re probably wondering how to rearrange them.
What if you want an image to appear one paragraph higher? What if you want to move multiple blocks to another location?
There are a few different ways to rearrange blocks in the block editor.
To move an individual block, use the Move Up or Move Down buttons in the toolbar to move the block one block up or block down. You can also click and hold the block to drag it to another location.

To move multiple blocks, click the top-most block you want to move. Then, hold the Shift key on your keyboard, and click the bottom-most block, then release Shift. All blocks between these two blocks (as well as the blocks themselves) will be selected, allowing you to move all as a group.
Lastly, you can open the Document Overview and rearrange blocks there by dragging and dropping their names.

How to Remove a Block
To remove a block, click on it to bring up the popup toolbar. Then, click the Options button (the three-dot menu/vertical ellipsis in the toolbar), and select Delete.

Alternatively, open the Document Overview, and delete the block from there by clicking the Options button and selecting Delete.

Some blocks, such as the Image block, can be removed by pressing backspace on your keyboard.
How to Group Blocks
To group existing blocks, open the Document Overview, then use the same Shift+Click method from before to select multiple blocks.
Quick refresher: click the top-most block you want to add to your group. Then, hold the Shift key, click the bottom-most block, and release Shift.
Click the Group button in the toolbar popup to group your selected blocks together.

How to Save Groups and Blocks as Patterns
You can save groups and individual blocks as “patterns” in WordPress. These are designs you save to a library that you can insert on other posts and pages.
It saves time by giving you a placeholder to work with rather than having to build and configure the design from scratch again.
To save a block as a pattern, click the Options button, and select Create Pattern.

Here’s how to configure and save your pattern:
- Name – Give your pattern a short yet descriptive name so you remember what it’s for, such as “Services Heading.”
- Categories – Select the categories you want to add your pattern to. These are different from the WordPress categories you set up for your blog. There are default categories, but you can also create your own by typing them in and hitting Enter.
- Synced – Controls whether or not you turn this pattern into a global pattern. If you do, any change you make to the pattern will be reflected on any page you add the pattern to. Disable this setting if you intend to use different styles and content every time you use this pattern.
Once you’re finished, click Add to save the design as a pattern.

To save a group as a pattern, click on one of the blocks in the group, and click the Select Parent Block: Group button in the toolbar.
Then, click the Options button, and select Create Pattern.
There are a couple different ways to add a pattern to a page or post in the block editor:
- Type “/pattern” in the block editor, and select the pattern you want to add to your page
- Click Add Block → Browse All → Patterns → select the pattern you want to add to your page*
*Find it under My Patterns or the category you added it to when you created it.

Viewing Your Design as You Create It
The best way to keep up with how your design looks on the frontend is by keeping two tabs open: one for the block editor and one for the frontend preview.
Open up a frontend preview by clicking the View button in the upper, right-hand corner, and selecting Preview in New Tab.
Click Save Draft in the WordPress editor whenever you want to view new changes you made. Then, refresh the frontend preview tab to see how those changes actually look on your site.
Image Credit


0 Comments