

Where Do I Start?
Do you feel like a deer in headlights at the thought of creating your own blog post? You might be thinking, I just figured out how to sign into my website dashboard last week. Let us help you start blogging with this step-by-step tutorial. Step one: don’t forget to breathe! You can do this!
UPDATE: this post applies to the WordPress Classic Editor. If you prefer to use that editor, you’ll want to install the Classic Editor plugin, since the default editor is now the new Block Editor (aka Gutenberg).
No, really this is step one, but relaxing and telling yourself you can do this is an important part of the process. First, we need to login into the WordPress Admin. Typically, the login would be “http://yourwebsiteurl.com/wp-admin”. This will bring you to a sign-in screen where you will enter your username and password. If you don’t know your password, you can hit the forgot password link and you will be emailed a password change link.
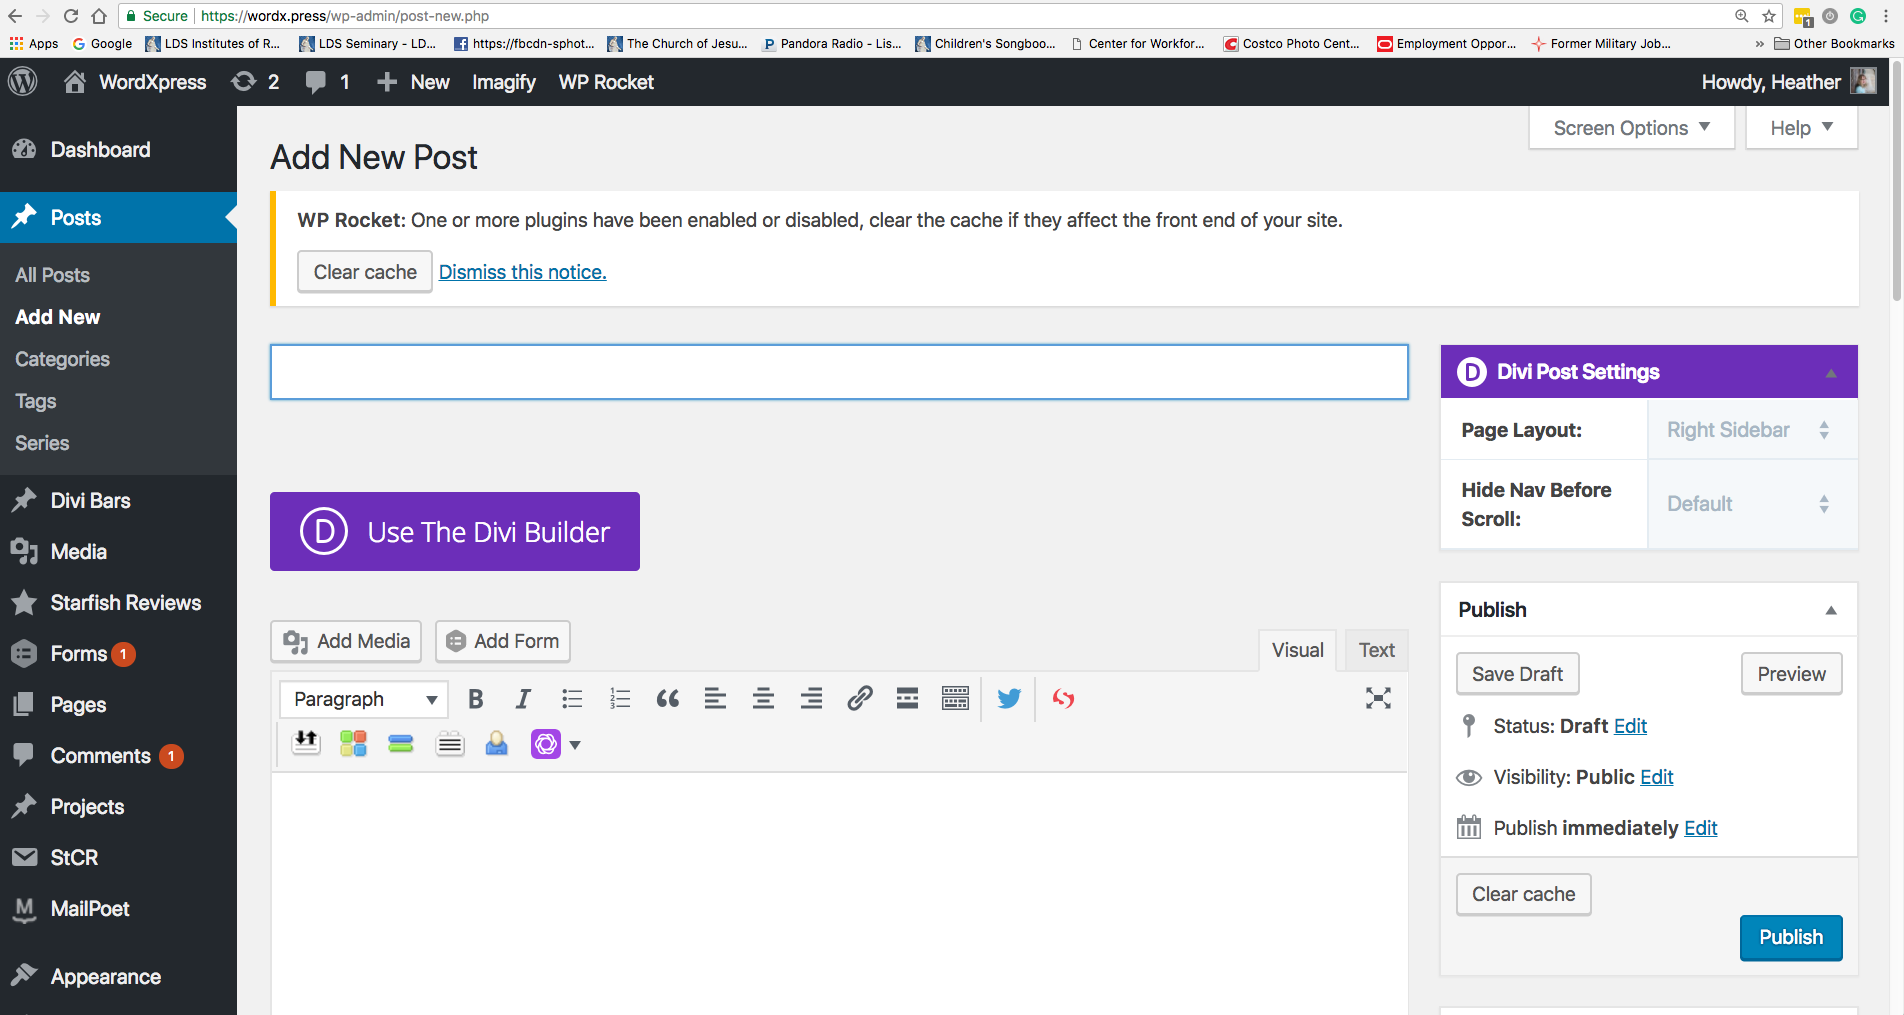
Once we have logged in you will see your dashboard. There is a lot of information on this dashboard. The dashboard is a glimpse of our website, but we don’t need to worry about all of that right now. On the left-hand side, you will see a menu. Hover your mouse on Posts, then click on Add New. This will bring you to the post editor. This is where we start creating your post!
What Now?
Every good blog needs a catchy title. Add your title where it says Enter Title here. This will be your H1 tag (Heading 1). More on heading tags below.
Next, write or paste your post into the large text box. All of this text will default to paragraph size and format. A good blog post uses headings every couple of paragraphs to help readers skim your content. This creates a more readable article. It’s a good idea to make sure you add some paragraph headings.
To create headings, highlight a line of text and find the drop-down that says Paragraph. When you click on the down arrow it gives you different options for your text. Click on Heading 2 (H2) for any subheadings that are in your text body. Your title is already an H1 tag and you only want one H1 tag per page. The higher the number used H2, H3, and so forth, the smaller the heading font size will be and the less important the heading will be.
By important, we mean that Google and other search engines will deem them less important in the hierarchy. You can have as many H2’s as you want, but if you need to divide that section into smaller pieces, then use H3’s for the sub-sections.
What are the other options for my text?
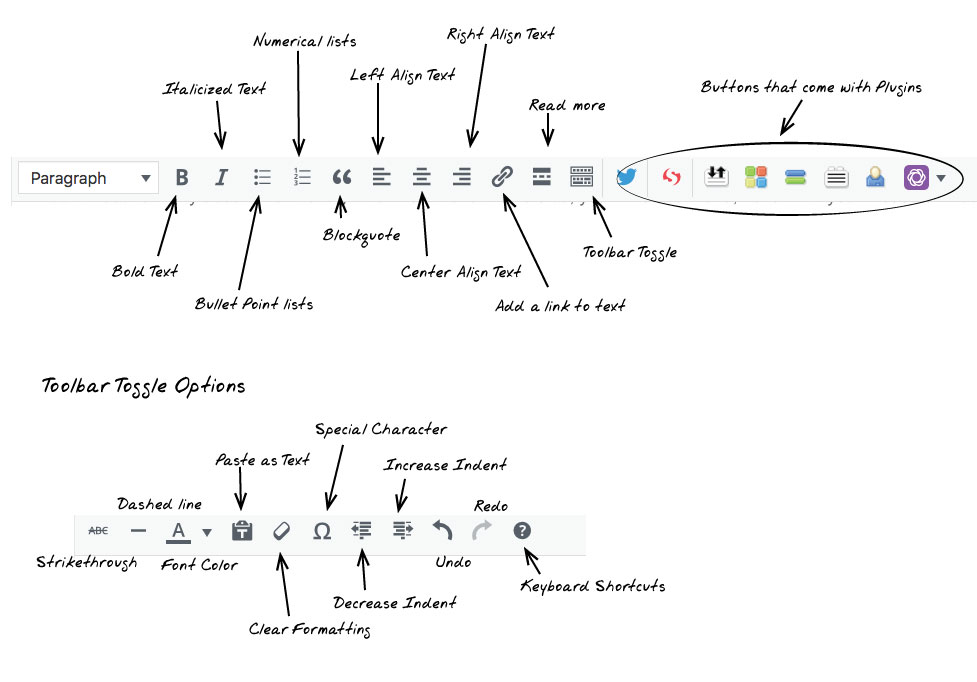
Next to the drop-down paragraph option, you have a couple of other options for formatting your text. Here is a list of what each button means:
- B stands for Bold
- I stands for Italics
- The three dots with lines is to create a bulleted list like we are using now.
- The numbers with lines is for a numbered list, which are great for steps or recipes.
- ” The quotation marks are for blockquotes. This is where you can add a prominent quote or idea for your blog.
- Just like in word, the lines to the left are align left, followed by align center, and align right.
- The chain links add a link to another website or another part of your website.
- The dashed line between 2 solid lines adds the “Read more” tag. Some themes use this to show where the post should be cut off when showing only a summary or preview.
- “Toolbar Toggle” gives you a few more options like text color, insert special character, and
strikethrough.
How do I Insert Images?
To insert an image click the add media button that’s above the toolbar. Your media library will pop open. There are two tabs at the top. Media library has all of your images that have already been uploaded. Upload files is where you can upload files from your computer or by a link. Though it’s recommended you always load images only from your own site.
To upload from your computer, hit the browse button and then find the image in your files you would like to use. Or drag and drop an image from your computer onto the media library.
To add an image to the top of your post scroll down the right side of the post editor and go to featured image. When you click on Set featured image, your media library will pop up and you can choose an image or upload one just the same as when using “Add media”. This featured image will display on the top of your article above your title and should be displayed whenever you share your post on social media. Though it’s all up to your theme exactly how this is handled.
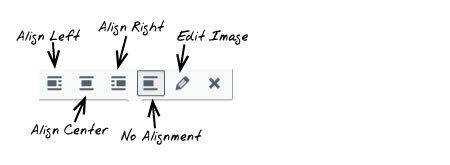
To make changes to the image, simply click on the image inserted in the post body.
What are Categories and Tags?
Now that you have all the written content and images are in place, we can add categories and tags. Websites typically have enough categories to cover the different topics of their blog. These categories are general topics related to the subject of your blog posts. If you are a dentist, you could have categories for “Dental Health”, “Dental Visits”, “Dental Specialties”, and more.
When writing a new post this is where you pick the underlying theme of the article. To continue with the dentist example, if I were going to write an article about when a child should visit the orthodontist, then I would categorize this in “Dental Specialties”.
Once you pick a category, then you will add tags. It’s really up to you if you use both categories and tags or not. We recommend using categories at the very least. Tags are just another way of sorting and finding your posts. If I use the example above I would use tags like “orthodontist”, “braces”, “when to visit the orthodontist” and more. There is no limit to the number of tags you use, just make sure they are relevant to your article and don’t make it excessive.
Can I Just Save my Work and Not Publish?
If you are not ready to immediately publish your content, you have options. The Publish section on the right-hand side allows you to save your draft, make your post private or password protected, and even schedule when you would like to publish your post. One of my favorite options is the Preview button. This opens up a tab that allows you to preview your current post. I really like to see my work as I working on a post so this is a great tool!
You have done it! You have officially posted your first blog post. Congrats and here’s to many more!
Watch our video tutorial for more help wpXpress!

0 Comments