

How you install a WordPress theme is dependent on if it’s available in the official theme directory or from a third-party developer.
You can install free themes from the directory directly within the WordPress admin area. You can do this with third-party themes (mostly premium themes) as well, but you’ll need to upload it as a ZIP file.
In this post, I go through the steps of how to install a WordPress theme in various ways.
How to Install WordPress Themes
These steps outline the most common way to install WordPress themes:
- Log into the admin area of your WordPress site.
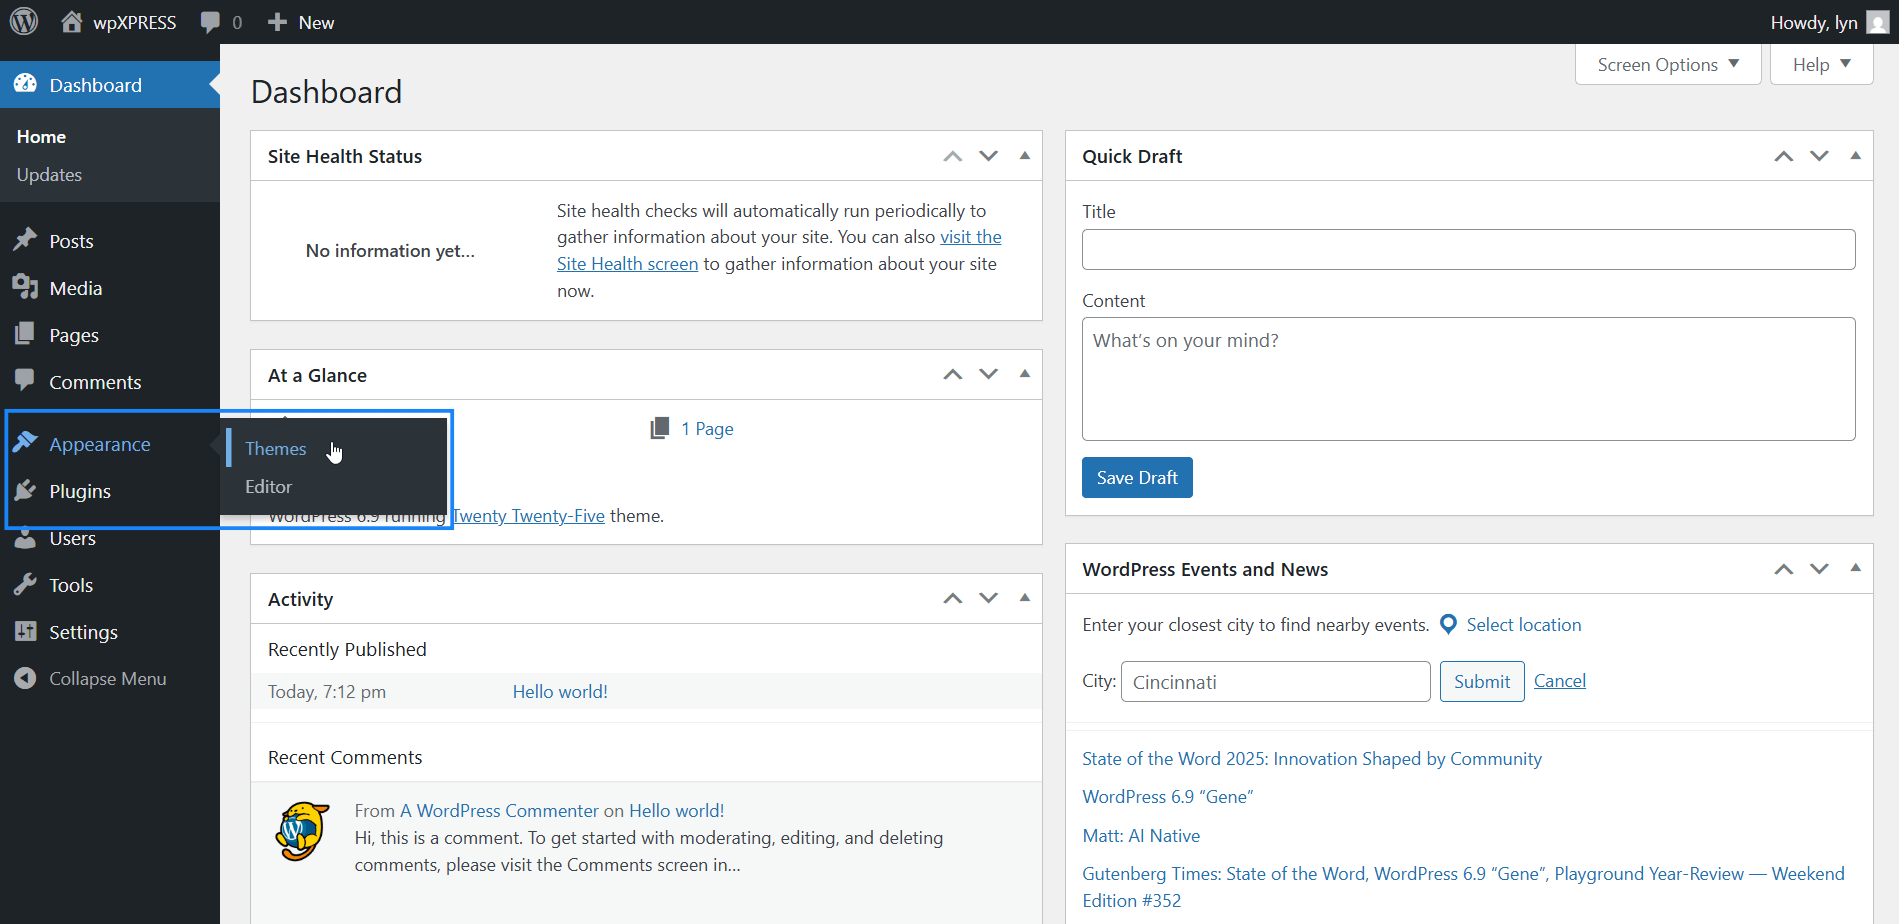
- Hover over Appearance in the admin menu to the left.
- Select Themes.
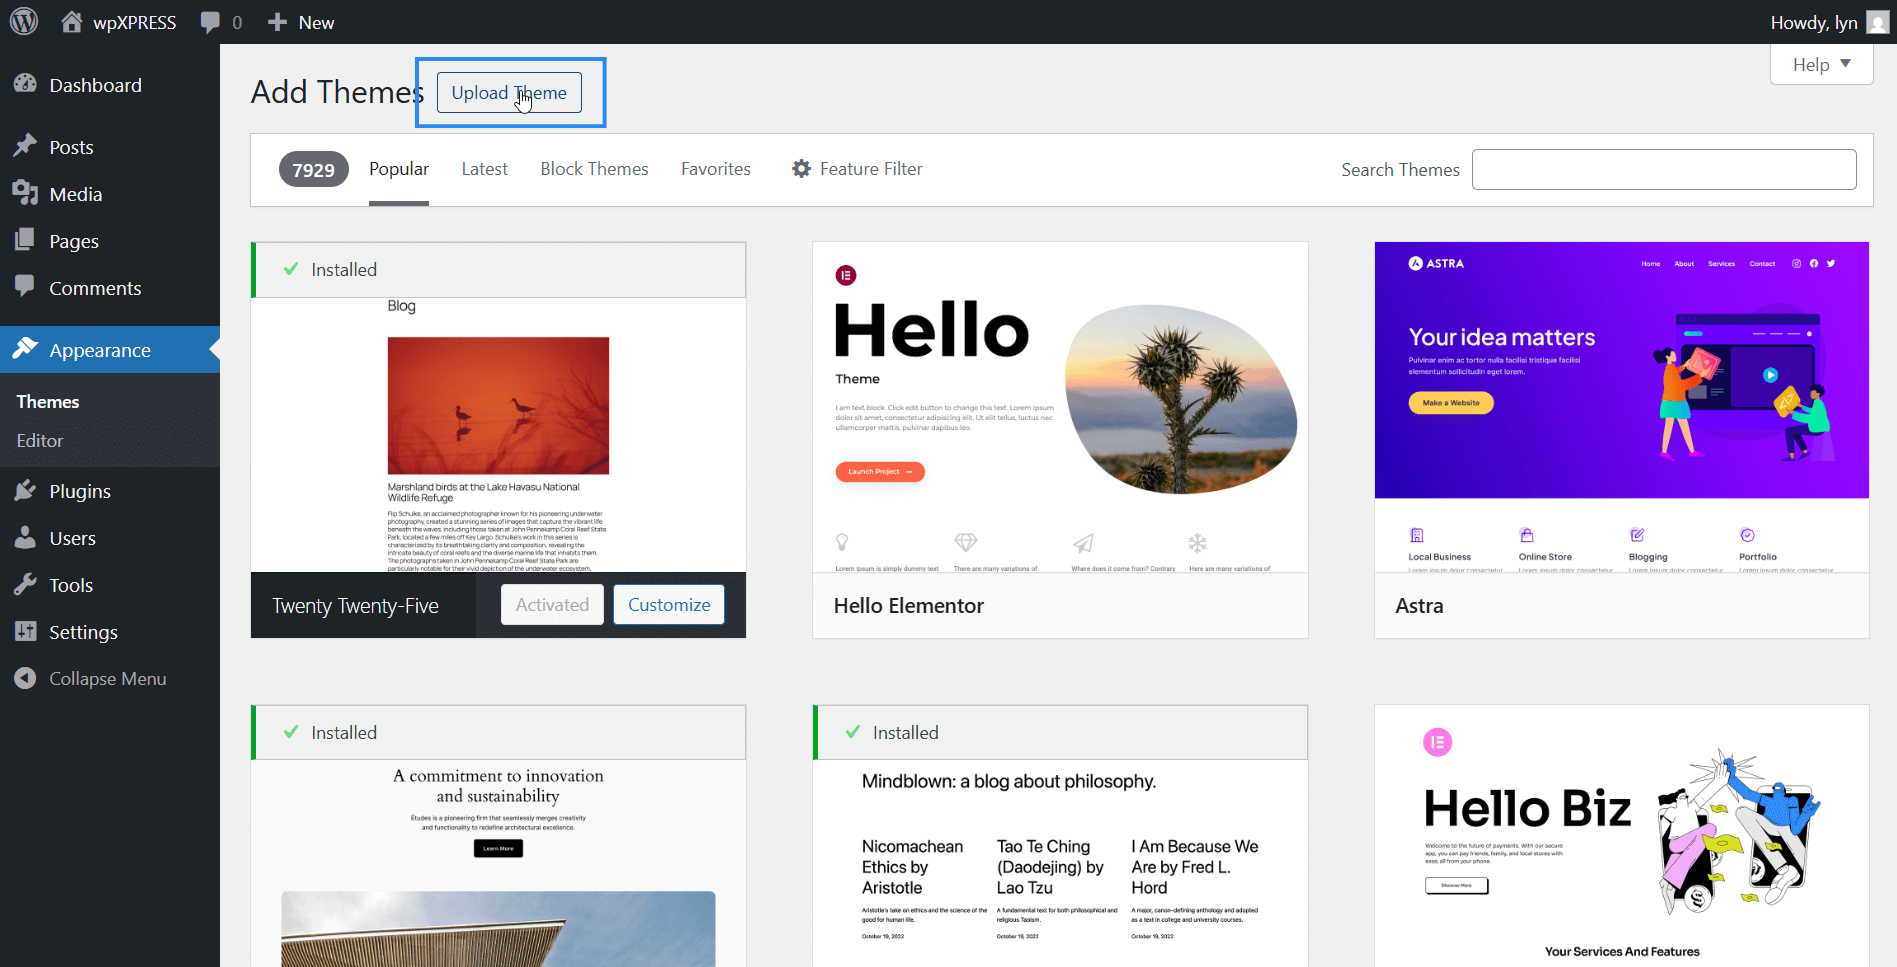
- Click Add Theme.
- Install the theme.
- If it’s a free theme that’s available in the theme directory, search for it. Then, hover over its preview image, and click Install.
- *If it’s a third-party theme, click the Upload Theme button to upload the ZIP file that came with it.
*This step does work for WordPress.com, but you’ll need a Business plan or higher.
Here are the steps laid out in pictures.
After logging into your WordPress site, hover over the Appearance menu item in the admin menu located on the left-hand side of the admin area, and select Themes.
Click Add Theme. It’s a button near the top of the page as well as a much larger button in the grid layout that’s showcasing themes that are already installed.

If you want to install a theme from the official WordPress theme directory, scroll until you find it or enter its name into the search bar, then click Install while hovering over the theme to install it.

If you have a third-party theme, click the Upload Theme button.
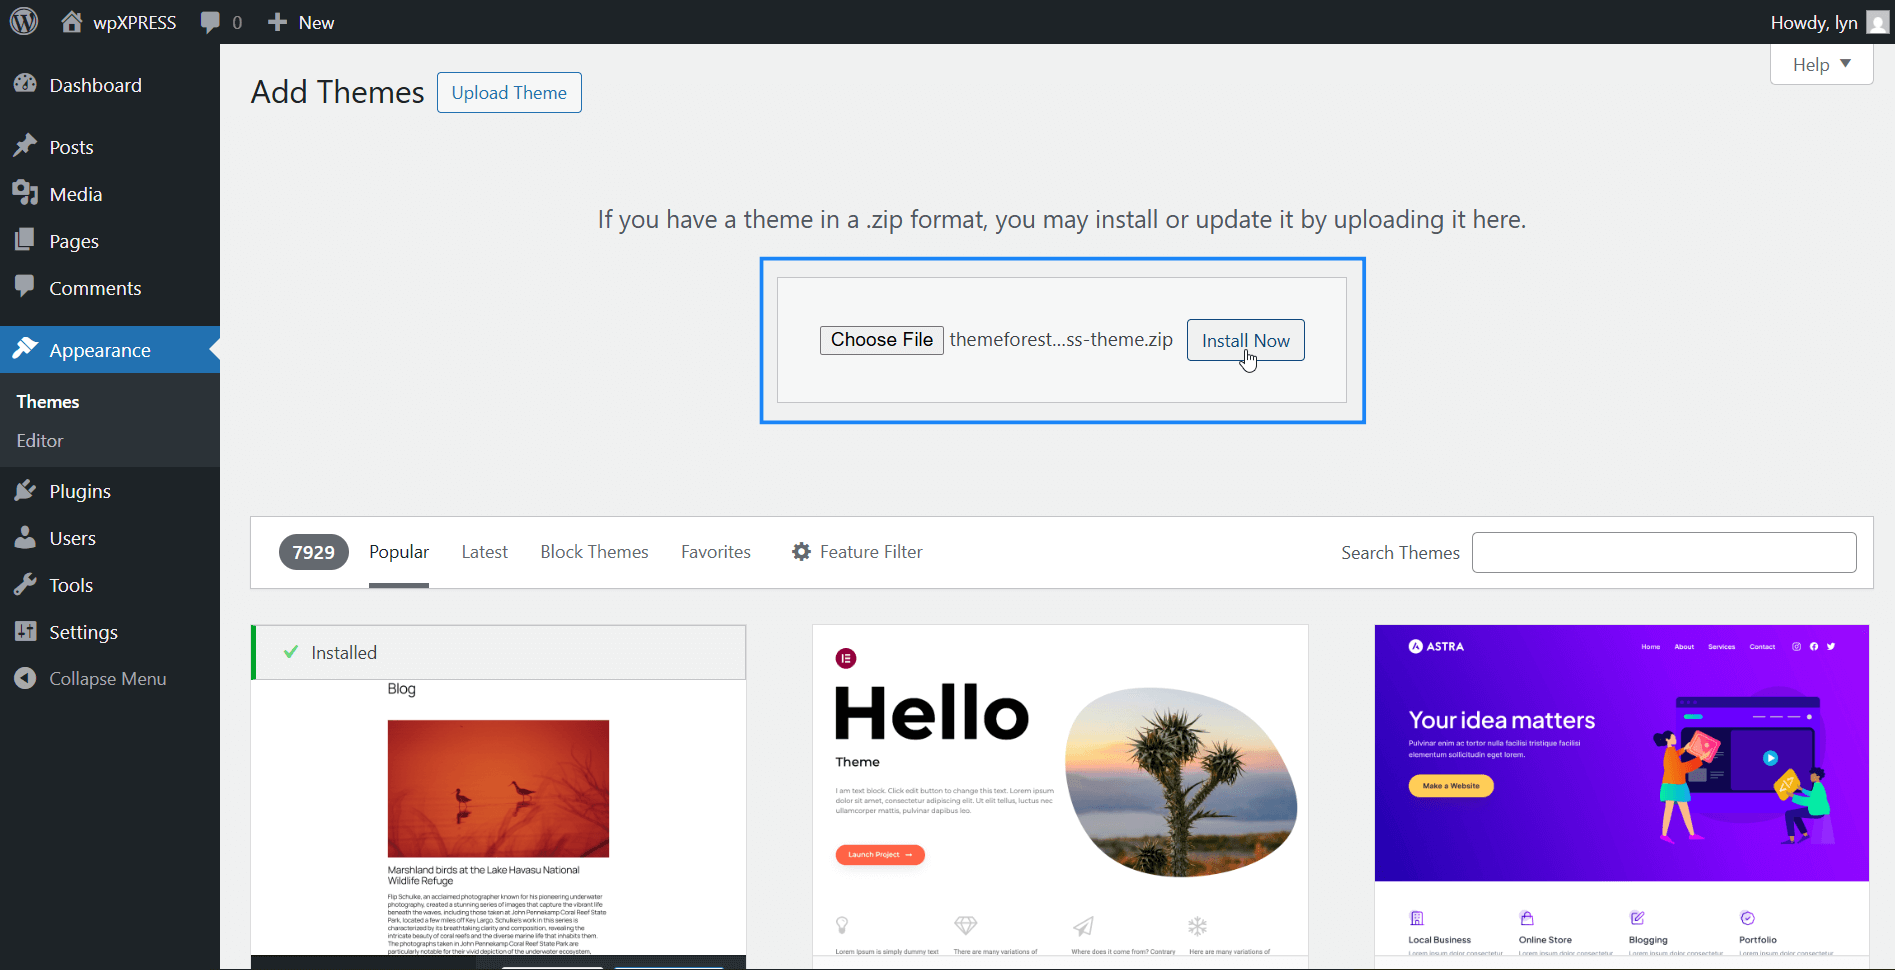
Then, click Choose File to upload the theme’s ZIP file. You can also drag the file to this box from your computer.
Then, click Install Now to install it.
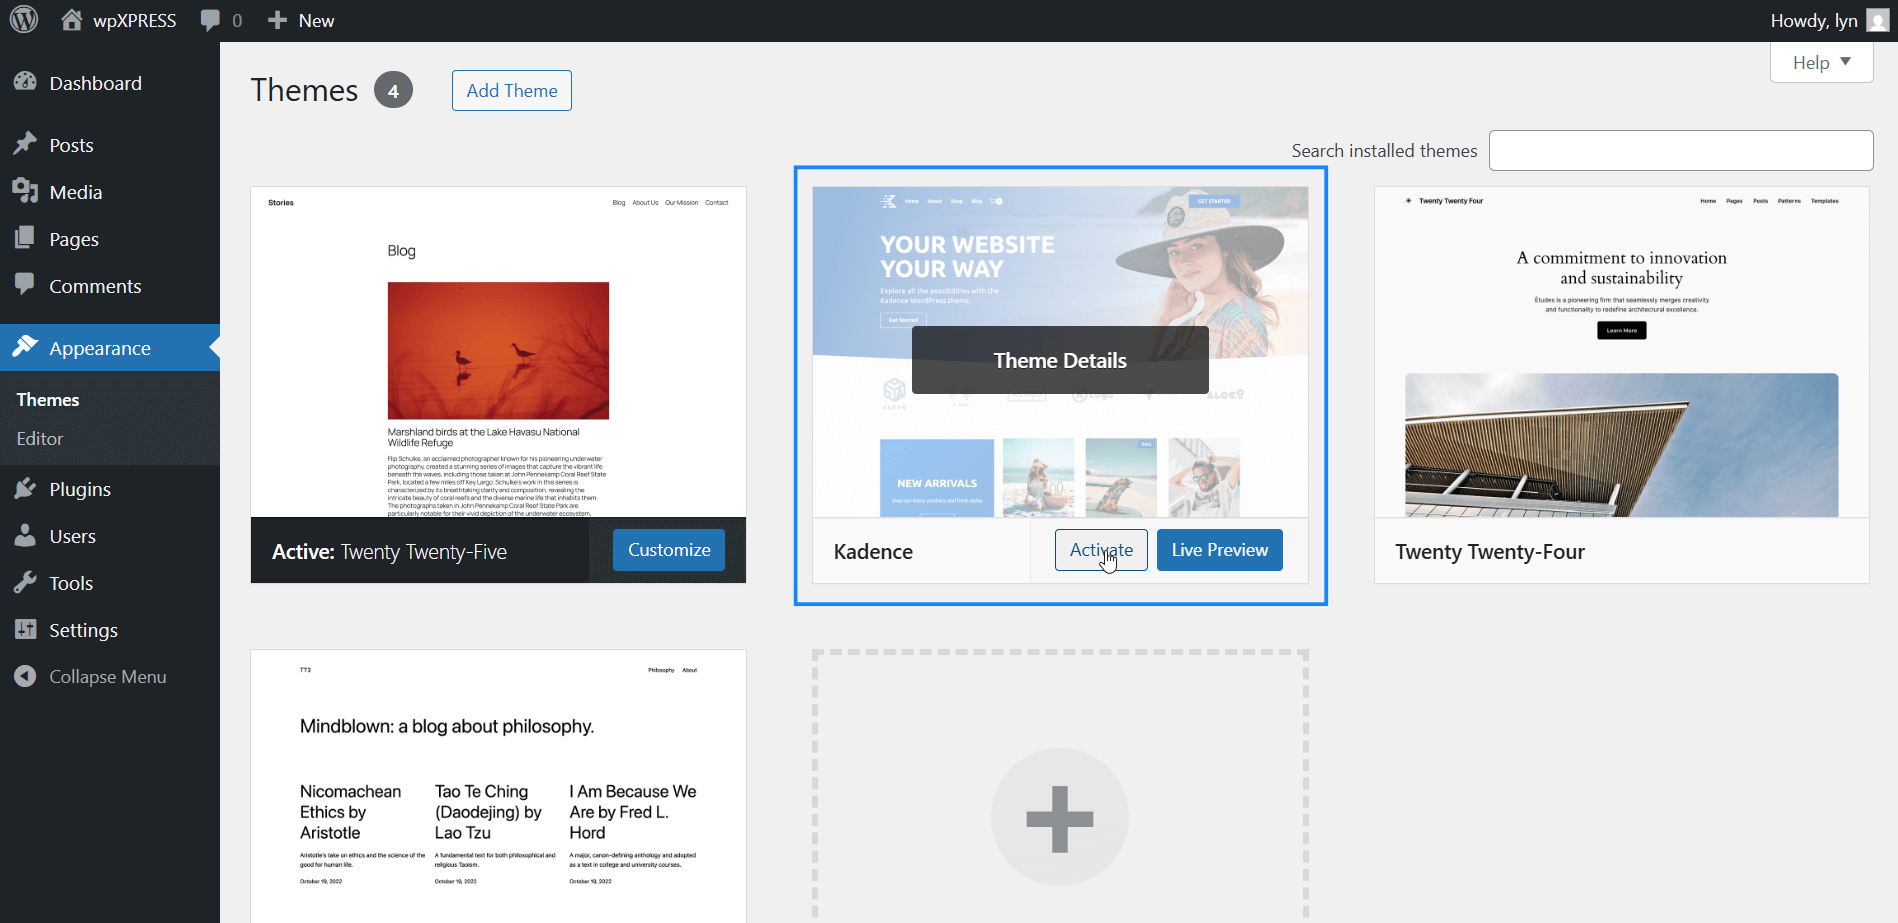
Activate your theme once you install it to switch your website’s design over to it.
How to Install WordPress Themes Manually
Follow these steps to install a WordPress theme manually:
- Download a copy of the theme you want to install.
- Extract the theme’s ZIP folder so you have an unzipped version of it. This is the version you need to upload to your website.
- Access your site’s file system with a file manager. Your host might offer this. If not, you’ll need an SFTP client like WinSCP.
- Open the “themes” folder. The path is usually public_html → wp-content → themes.
- Upload the extracted version of your theme to the “themes” folder.
- Activate your theme from the WordPress dashboard.
Installing a WordPress theme manually involves uploading the unzipped version of the theme’s folder to the “themes” folder in your site’s file system.
This is easy to do. The hard part is accessing the file system, which can be a little complicated if you’ve never done it before.
It might not be as complicated as it could be if your host lets you access your file system from their hosting panel.
Look for a tool called “File Manager.” If you can’t find it, your host might not offer it. You can always Google “[host’s name] file manager” just to be sure, such as “hostinger file manager.”
Once you find it, locate your site’s root folder. It’s usually named “public_html.” Open this folder, then open an inner folder called “wp-content.”
In a separate window, download the theme you want to install.

This gives you a ZIP file, but you can’t upload a zipped file directly to your site’s file system. You’ll need to unzip the file (extract it) instead, then install the inner folder.
The exact folder you need should be named after the theme. If you see files named “functions.php,” “header.php” and “style,” you have the right folder.

Go back to your file manager, and open the “themes” folder. Remember, it’s under public_html → wp-content → themes.
Upload the theme folder you extracted to this folder. Your theme should now be installed on your site. Activate it from the WordPress dashboard if so.
Note: It’s possible that your host’s file manager has an extraction tool built in. Hostinger offers this. In this case, you can upload the original ZIP file to the “themes” folder, then extract it from there.
How to Install WordPress Themes Manually with an SFTP Client
You’ll need to use an SFTP client if your host doesn’t have a file manager tool. This will allow you to access your site’s file system from your computer.
This method requires:
- An SFTP client like WinSCP
- SSH credentials
Your host might generate SSH credentials for you. You can find them in your hosting panel if so.
Cloudways allows you to generate SSH credentials on your own.
Follow these steps in order to access your site’s file system from your computer:
- Install an SFTP client. I recommend WinSCP*, which you can download here. Choose the Typical Installation and Commander options during the installation process.
- Open WinSCP, and choose the following parameters in the window that pops up:
- File Protocol: SFTP
- Host Name: Enter your server’s public ID address. You can find this in your hosting panel
- Port: 22
- User Name: The SSH username you or your host set up
- Password: The SSH password you or your host set up
- Click the Login button once you’ve entered everything.
- Press Yes or Accept to bypass the security warning that pops up.
- Open the folder where your theme folder is located on your computer in the left-hand panel.
- Open the “themes” folder in the right-hand panel. The path is typically public_html → wp-content → themes.
- Drag your unzipped theme folder from the left-hand panel over to your “themes” folder in the right-hand panel.
- Press OK when prompted.
- Wait for the transfer to complete.
- Log into the WordPress dashboard to activate your theme.

*I used to recommend FileZilla as an SFTP client, which does work pretty well, but their installer triggers security warnings in Windows due to the presence of adware, making it annoying to use.
Frequently Asked Questions
How do you activate a WordPress theme?
From the WordPress dashboard, go to Appearance → Themes. Then, find the theme you want to activate, hover over it, and click the Activate button.
How do you download a WordPress theme ZIP file?
This depends on where you got the theme.
Some themes are free to download, oftentimes without an account. This is the case with themes on WordPress.org.
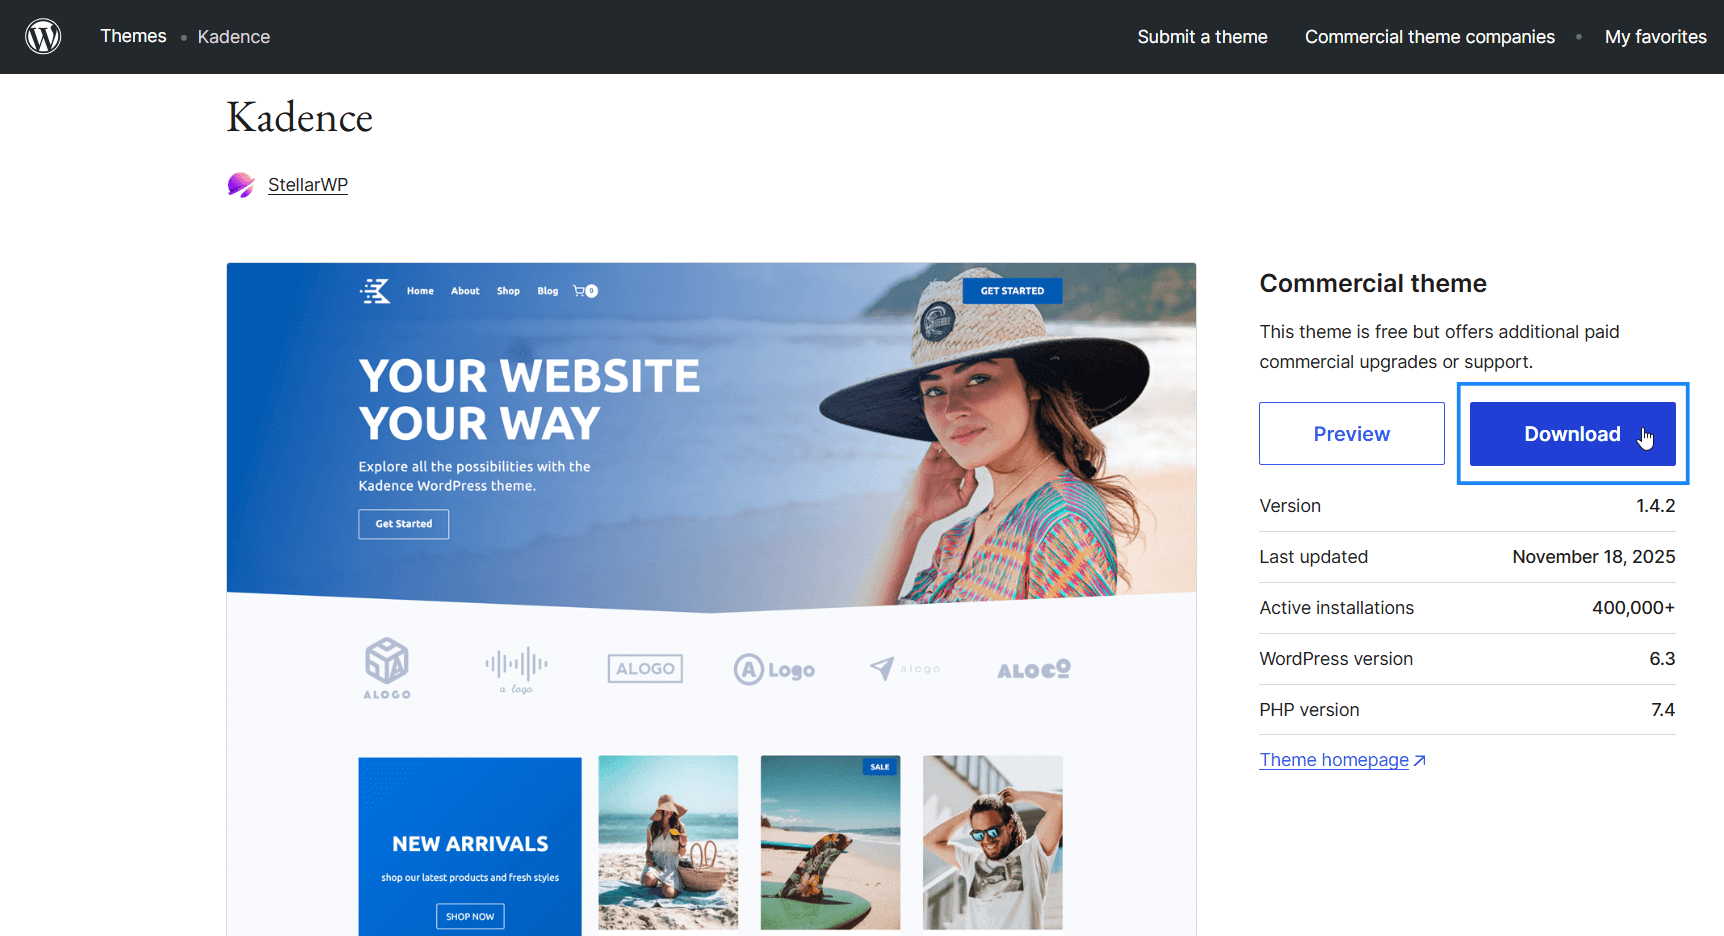
If you bought a premium theme, you’ll need to download a copy of it from wherever you purchased it from.
You might get an email from the developer that contains a link to the theme’s download page.
If not, log into wherever you purchased the theme from, and look for a “Downloads” or “Purchases” section in the account area.
How do you install WordPress themes from Envato (ThemeForest)?
After you purchase a theme from Envato, hover over your account name in the menu in the upper, right-hand corner while logged into the website, and click Downloads.
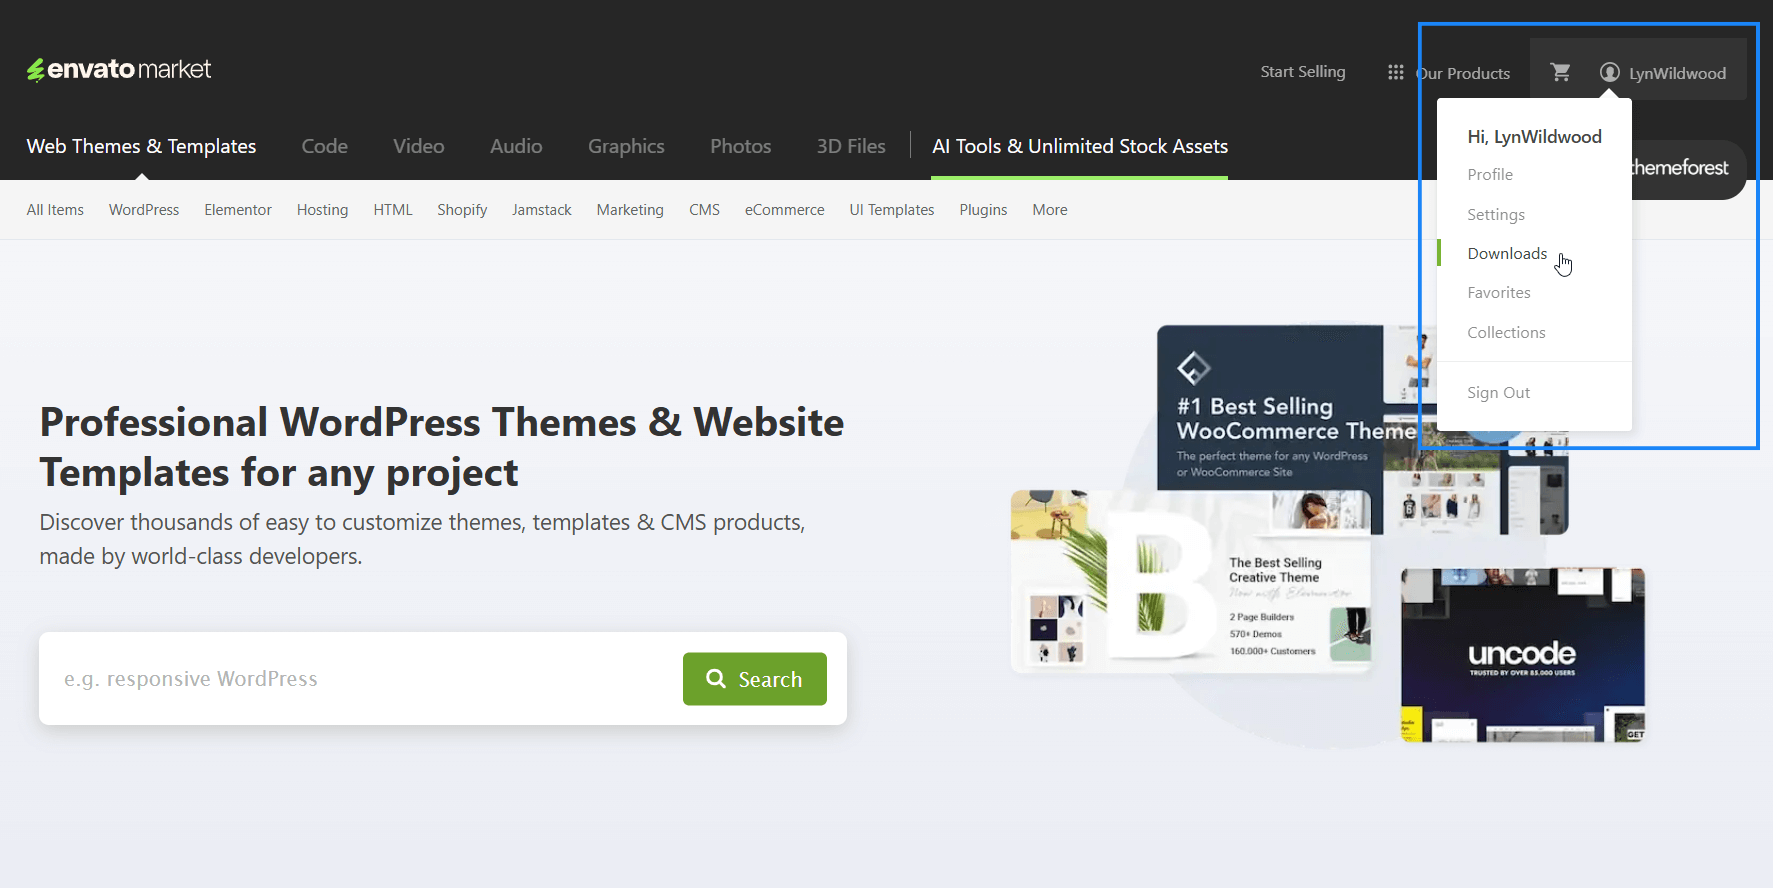
Then, click the Download button for the theme you purchased, and click “Installable WordPress file only.”
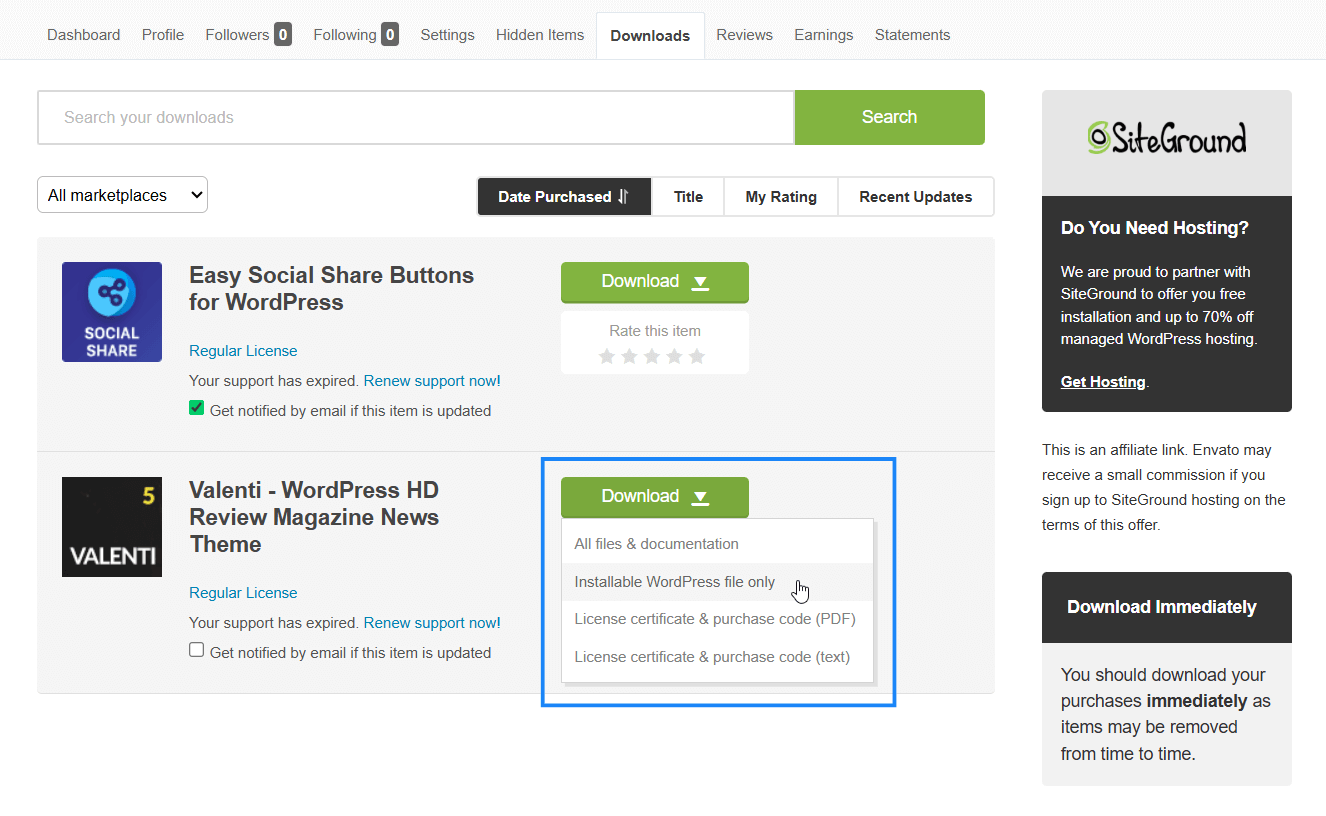
This ensures you only download the ZIP file you need to upload to WordPress.
How do you install WordPress themes locally?
Use an SFTP client like WinSCP to install WordPress themes locally from your computer.
You’ll need SSH credentials for your server as well as your server’s public IP address.
Use the IP address as your host name, port 22 and the SFTP file protocol.
Make sure you extract the theme from its original ZIP file before installing.
How do you install WordPress themes with demo content?
When a theme has numerous demos to pick from, they usually have a built-in way to install them.
Some themes have an onboarding wizard that guides you through the process of installing demo content. Some have this option located somewhere in its settings.
Others require a plugin, which includes the demo or “starter” content. It’s usually free and available to download from Plugins → Add Plugin.
Look through your theme’s help docs in the support section of the developer’s website if you need help.
How do you install WordPress themes in cPanel?
In cPanel, go to Tools → WP Toolkit → click on your website → go to the Themes tab → click Install.
cPanel has a tool called WP Toolkit, which allows you to install WordPress themes without logging into the WordPress dashboard or using a file manager.
All you need to do is go to Tools, and then WP Toolkit.
The website you have installed for cPanel should be listed here. Click on it, then open the Themes tab to reveal themes you already have installed on your website.
You’ll also see an Install button, which you can use to install new themes from cPanel.
How do you add a custom theme in WordPress?
Follow standard guidelines for creating a WordPress theme, such as including essential pages like page.php and index.php.
You’ll need a properly formatted stylesheet named style.css in order for WordPress to recognize your theme.
Then, arrange your theme files in a folder that abides by WordPress standards, and upload it using one of the methods I described on this page.


0 Comments