Using custom fonts is a great way to personalize and enhance the look of your GoHighLevel projects. Custom fonts can make your branding stand out and create a unique user experience. In this guide, we will walk you through the steps to easily add and use custom fonts in GoHighLevel, ensuring your designs reflect your brand’s personality and style.
While other tutorials may suggest creating a course and uploading the custom font to use it under Custom CSS, this tutorial offers a more direct approach.
Step-by-Step Guide
Step 1: Look for the Font in CDN Fonts
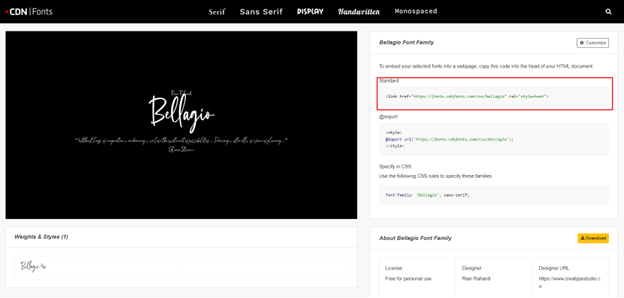
Go to https://www.cdnfonts.com/ and at the top-left corner, search for the font family you are looking for
Once you find the font, click on it. On the next page, you will see options on how to embed, import, or specify the font in CSS. For this tutorial, use the Standard embed option.
Copy the Standard embed option
Step 2: Pasting the Embed Code to GoHighLevel
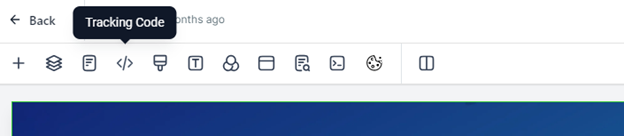
Go to the funnel and choose the specific step where you would like to use the custom font
Click on the Tracking Code tab
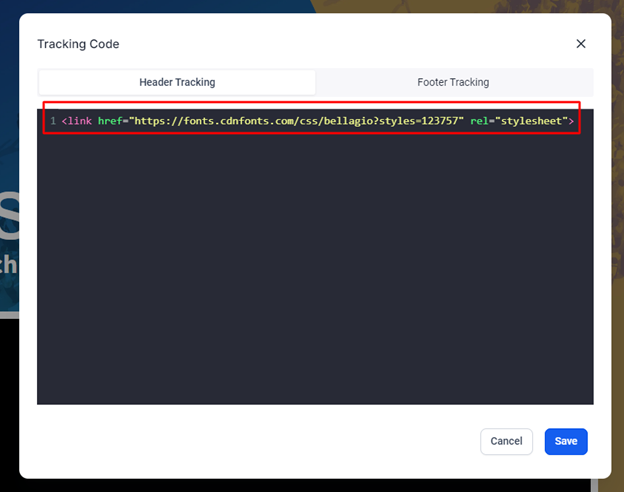
Paste the embed code to the Header Tracking code panel and save it
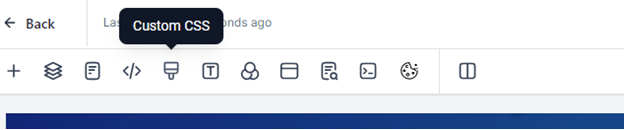
Step 3: Determine Which Word or Phrase Should Have the Custom Font
Choose which text element you would like to use the custom font on
Go to its advanced settings and set a custom class to identify the specific element in your CSS code.
Decide which text will use the custom font. For this example, we will apply it to italicized text.
NOTE: em is the selector for the italicized text in this case. Customize the font-size, weight, and style as needed. Use the font-family you embedded (e.g., ‘Bellagio’).
Save the CSS code. You will notice that the targeted text changes in size, weight, or style, but the custom font may not appear immediately. It will show up in the preview or live view of the page.
Step 5: Save/Publish and View the Live Page
Save the changes and/or publish your page.
Preview your page to see the custom font applied to the targeted text.
Here is a sample of what we did for one of our clients:
Additional Tips
You might need to use the custom font on multiple sections of your funnel page, requiring different custom classes for different texts or phrases.
Consider applying different font sizes for different devices. Here are examples for tablet and mobile views:
For tablet view:
/* If the screen size is 980px wide or less, set font-size to 65px */
@media only screen and (max-width: 980px) {
  .with-contrast-font em {
    font-size: 65px;
  }
}
For mobile view:
/* If the screen size is 480px wide or less, set font-size to 40px */
@media only screen and (max-width: 480px) {
  .with-contrast-font em {
    font-size: 40px;
  }
}
And there you have it. It’s really simple to use custom fonts in your GoHighLevel projects. By following these steps, you can ensure your designs are unique and align with your brand’s personality. Feel free to experiment with different fonts and styles to find the perfect fit for your site.
To provide the best experiences, we use technologies like cookies to store and/or access device information. Consenting to these technologies will allow us to process data such as browsing behavior or unique IDs on this site. Not consenting or withdrawing consent, may adversely affect certain features and functions.
Functional
Always active
The technical storage or access is strictly necessary for the legitimate purpose of enabling the use of a specific service explicitly requested by the subscriber or user, or for the sole purpose of carrying out the transmission of a communication over an electronic communications network.
Preferences
The technical storage or access is necessary for the legitimate purpose of storing preferences that are not requested by the subscriber or user.
Statistics
The technical storage or access that is used exclusively for statistical purposes.The technical storage or access that is used exclusively for anonymous statistical purposes. Without a subpoena, voluntary compliance on the part of your Internet Service Provider, or additional records from a third party, information stored or retrieved for this purpose alone cannot usually be used to identify you.
Marketing
The technical storage or access is required to create user profiles to send advertising, or to track the user on a website or across several websites for similar marketing purposes.


0 Comments